Understanding the Importance of Bond Cleaning
As a tenant, the time inevitably comes for you to leave your rental property. Ensuring that you receive your full bond back lies in the methodical execution of bond cleaning. This extensive cleaning process is not merely a deep clean; it’s foundational in satisfying your landlord’s requirements. When done properly, bond cleaning can save you from disputes and financial loss. But what does it entail? Let’s delve into the facts.
What is bond cleaning?
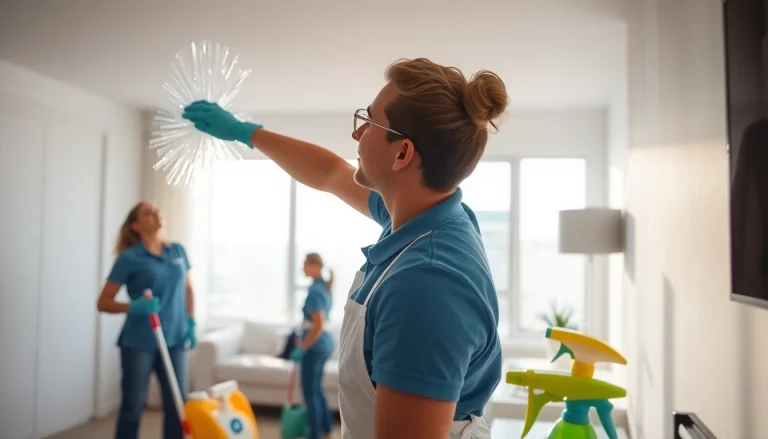
Bond cleaning, also known as end-of-lease cleaning, refers to a thorough clean of a rental property before vacating, ensuring it is returned to its original condition. This process serves to safeguard your bond money, which is typically held as security against potential damages, cleaning costs, or unpaid rent. A satisfactory bond clean should address every nook and cranny of the residence, from windows and carpets to bathrooms and kitchens.
Why is bond cleaning necessary?
Bond cleaning is essential for several reasons:
- Security Deposit Return: Landlords or property managers often have precise expectations for cleanliness when returning the keys. Failure to meet these expectations may result in deductions from your bond.
- Standard Compliance: A well-executed bond clean complies with tenancy agreements and minimizes disputes between tenants and landlords.
- Increased Habitability: A dirty property can harbor pests and health hazards, which is why the bond cleaning process ensures a healthy environment for incoming tenants.
- Professional Impression: Leaving the property in pristine condition shines a favorable light on you as a tenant, potentially easing future renting processes or references.
Key differences between bond cleaning and regular cleaning
Many people often confuse bond cleaning with routine housekeeping; however, several distinctions set them apart:
- Scope of Work: Regular cleaning focuses on surface-level clutter and tidiness, while bond cleaning demands a comprehensive scrub of areas often neglected, including behind appliances and scouring grout.
- Time Commitment: Bond cleaning usually takes longer than a standard clean, requiring meticulous attention to detail to ensure every corner meets high standards.
- Property Ownership: Regular cleaning is about maintaining personal spaces; bond cleaning centers on fulfilling landlord requirements for property condition upon departure.
Steps to Prepare for Bond Cleaning
Preparing for bond cleaning is critical to ensure that the entire process runs smoothly. Below are actionable steps to effectively organize your bond cleaning endeavor.
Creating a checklist for bond cleaning
A checklist is an invaluable tool while preparing for bond cleaning. It not only helps you stay organized but also ensures that no areas are overlooked. Here are essential items to include in your checklist:
- General Cleaning: Dusting surfaces, vacuuming carpets, and mopping floors.
- Kitchen: Cleaning inside and outside of cabinets, disinfecting countertops, and scrubbing the oven and refrigerator.
- Bathrooms: Scrubbing toilets, sinks, tiles, and bathtubs, and ensuring mirrors and glass are streak-free.
- Bedrooms: Clearing the closets, dusting baseboards, cleaning windows, and removing any nails or fixtures from walls.
- Living Areas: Vacuuming upholstery, removing cobwebs from ceilings, and polishing furniture.
Gathering the proper supplies and equipment
Having the right cleaning supplies at your disposal can make a significant difference in achieving effective results. Essential supplies include:
- Cleaning Chemicals: All-purpose cleaner, disinfectants, glass cleaner, and carpet shampoo.
- Tools: Mops, brooms, vacuum cleaners, sponges, microfiber cloths, and scrub brushes.
- Protective Gear: Gloves, masks, and safety goggles to protect from harsh chemicals and dust.
Pre-cleaning preparations to enhance effectiveness
Before diving into bond cleaning, you should prepare your space effectively:
- Declutter: Remove personal belongings and excess items that might obstruct the cleaning process.
- Inspect: Check for any damages or required repairs that should be noted before cleaning.
- Divide and Conquer: Divide your cleaning tasks by room and allocate specific time frames for each area to ensure efficient navigation of the property.
Best Practices for Bond Cleaning
Implementing best practices during your bond cleaning journey will enhance the overall effectiveness and efficiency of your efforts. Here are some methods to consider.
Room-by-room cleaning procedures
Having a structured approach to cleaning various rooms can streamline the process:
- Kitchen: Start with dusting light fixtures, then focus on countertops and cabinets—ensuring all appliances (oven, refrigerator, dishwasher) are cleaned inside out. Don’t forget about sinks and backsplashes!
- Bathrooms: Begin with scrubbing the shower and bath, followed by toilets and sinks. Mirrors should be cleaned last for a sparkling finish.
- Living Room: Dust from top to bottom, tackling ceiling fans before working down to furniture and flooring. Vacuum carpets thoroughly to remove dirt and allergens.
- Bedrooms: Address built-in wardrobes by cleaning all inner spaces. Change beddings, dust blinds, and clean windows.
Common bond cleaning techniques and tips
Employing effective techniques can dramatically improve your cleaning results:
- Top-to-Bottom Cleaning: Always start cleaning from the highest point in the room and end at the floor to prevent re-cleaning.
- Use the Right Tools: Specialty tools such as steam cleaners can effectively sanitize and remove hard stains.
- Let Solutions Sit: If using cleaning agents, allow them to sit on surfaces for a few minutes before scrubbing, making for easier stain removal.
Addressing tough stains and marks
Some marks require additional effort to remove effectively. Here are some standard solutions:
- Grease Stains: For kitchen surfaces, a mix of baking soda and vinegar can break down tough grease. Apply the paste, let it sit, and scrub away.
- Water Stains: Use a mixture of vinegar and water to clean showerheads and taps. This solution effectively removes hard water build-up.
- Carpet Stains: Blot stains (don’t rub) immediately with a towel. For dried stains, mix water and mild detergent, apply, and blot.
Hiring Professionals for Bond Cleaning
While many tenants opt for a DIY approach to bond cleaning, it’s worth considering when professional help is necessary. Understanding how to find the right services is imperative.
When to consider professional help
Spotting whether the task may be too large for a DIY effort is crucial. Here are some considerations:
- Time Constraints: If you have limited time before your move-out date, hiring professionals can expedite the process.
- Property Size: Larger properties or those with extensive outdoor spaces may require more manpower and expertise than a standard DIY clean.
- Specific Issues: Properties with persistent issues such as mold, severe staining, or pest infestations are best handled by professionals.
What to look for in a bond cleaning service
Finding the right cleaning service involves evaluating a few critical criteria:
- Experience: Choose a service with a proven track record in bond cleaning, as they will be familiar with property manager requirements.
- Reviews: Look for customer testimonials online or ask for references to get a sense of their reliability and thoroughness.
- Insurance: Ensure they have liability insurance to protect against potential damages during the cleaning process.
Questions to ask before hiring
Engaging a professional service involves some due diligence. Here are essential questions you should ask:
- What does your service include? Make sure there’s clarity on the tasks they will cover.
- How do you charge? Understand the pricing structure—whether it’s hourly or a flat rate.
- Can you provide an estimate? Get a written estimate for transparency on costs involved.
Post-Bond Cleaning Checklist and Follow-up
After completing the bond cleaning, having a post-cleaning checklist can aid you in finalizing the process.
Final inspections and walkthroughs
Before returning your keys, conducting a final inspection is crucial:
- Inspect Each Room: Walk through each room to ensure everything has been cleaned and meets quality standards.
- Check Off the Checklist: Cross-reference your cleaning checklist to confirm that no task has been overlooked.
- Document Condition: Take photos of the cleaned property to serve as evidence in case of disputes regarding your bond.
How to ensure you get your bond back
To increase your chances of receiving your bond back in full:
- Communicate with Your Landlord: Keep open lines of communication and discuss expectations for the property’s condition upon return.
- Address Repairs: Take care of any minor repairs that could be contentious, such as paint touch-ups or fixing loose fixtures.
- Understand the Bond Return Process: Familiarize yourself with local laws regarding bond returns to ensure your rights are protected.
Maintaining cleanliness after bond cleaning
Once you’ve successfully completed bond cleaning, maintaining cleanliness is essential as you transition between homes:
- Regular Upkeep: Create a cleaning schedule to avoid accumulating mess in your new home.
- Declutter Regularly: Reduce clutter as it can bog down your living space and increase cleaning time later.
- Involve Other Members: If living with family or roommates, involve them in cleaning duties to foster shared responsibility.